[PConline] talk about good DIY refrigerator tutorial is finally here! When the live broadcast last month, the sea said to DIY a USB refrigerator, but because the preparation is not enough, only to achieve the principle of semiconductor refrigeration, there is no refrigerator enclosure, or even switch. As a liberal arts student, who knows nothing about physical and chemical chemistry, this sea has finally completed this "Crazy cool and hot dual-use transparent USB refrigerator" with the help of Huang Huang next door, Beast next door, and G fat next door! Do not talk nonsense, first on the finished product map.
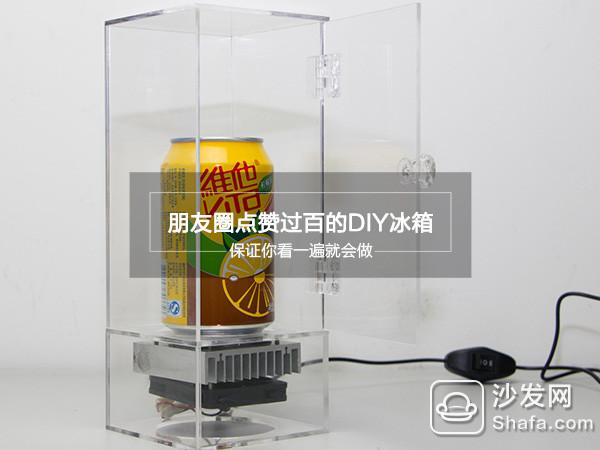
Although it is already in the fall, but the temperature in Guangzhou is still maintained at around 30 degrees for a long time. When sweating, the most wanted thing is to come for a bottle of iced drinks. But if you don't finish the drink right away, it will soon become as hot as the surroundings. Is there any way to make a small refrigerator that can be placed on the table and even carried around?
Our common refrigeration principle is two kinds, one is the refrigeration of the compressor used in the refrigerator, and the other is the semiconductor refrigeration used in the drinking fountain. Semiconductor refrigeration requires only direct current and a semi-conductor refrigeration chip, so it is more in line with the requirements that can be placed on the desktop.

Electronic refrigeration: also known as semiconductor refrigeration, or thermoelectric cooling, is a discipline that has developed from the 1950s on the edge of refrigeration technology and semiconductor technology. It uses a PN junction made of special semiconductor materials to form a pair of thermocouples. The Erte effect, a new type of refrigeration method that uses direct current cooling, and compression type refrigeration and absorption type refrigeration, are also known as the world's three largest refrigeration methods.
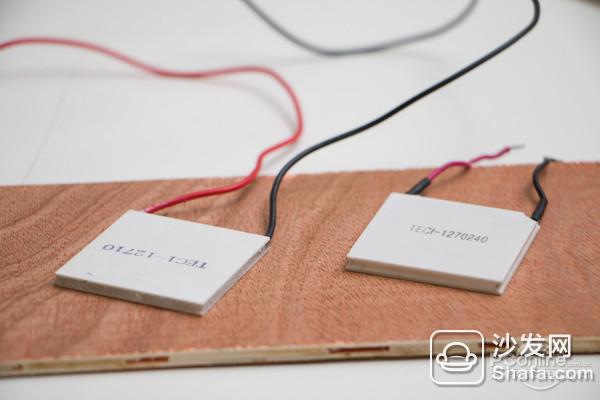
After understanding the principle, we came up with a design plan. Xiaobian made reference to the solution for a 50-buckle refrigerator on a certain treasure. The original solution used a 5V TEC1-1270240 cooling sheet, but since this cooling sheet is not available online, it can only be replaced with other models. Here I used TEC1-127010. Although the 5V voltage has not reached its rated voltage, it can still be used after the Xiaobian death test. However, it is not recommended that everyone should be confused.
Because the other side of the semiconductor cooling will be a lot of heat, so we purchased two aluminum heat sink, where you need to pay attention to is that the hot end of the heat sink must be thicker than the cold end, so as to make the temperature difference between the two sides to form a cooling effect. When you buy, remember to call the seller to play 4 holes for you so that the screws can be fixed later.
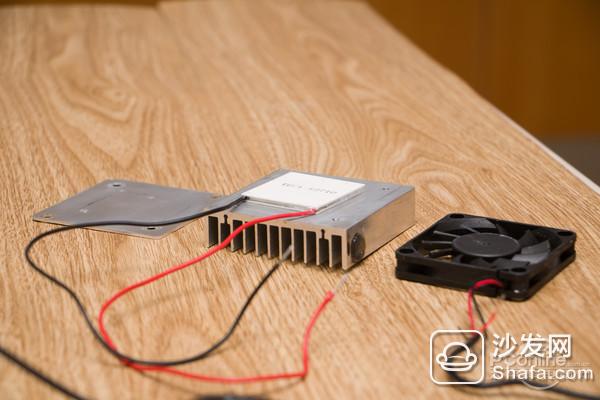
In general, the side of the cooling plate printed with the model is the cold end, so this side is to be faced up when assembling. As for this fan, it is also a 5V 0.3A fan bought online, because it is decided to use USB power supply, so we must choose a 5V fan. The size of the purchased fan is relatively fixed, so it is recommended that you first determine the size of the fan and then customize the cooling plate. Assembled is probably such a thing.
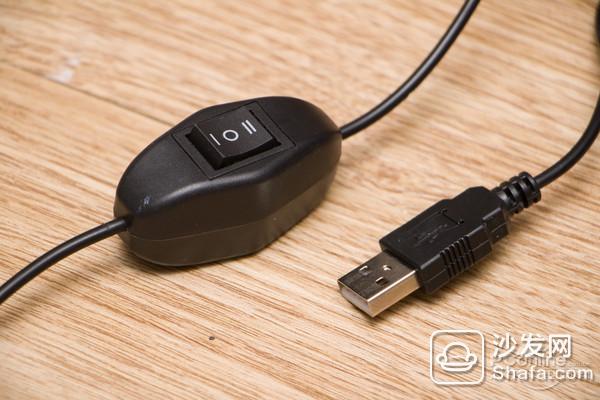
According to the principle of semiconductor refrigeration, as long as the direction of the current is changed, the cooling and heating ends can be interchanged. Therefore, we have chosen a three-phase switch with an empty mid-solder, and the two ends correspond to two different current directions. Can achieve both hot and cold.
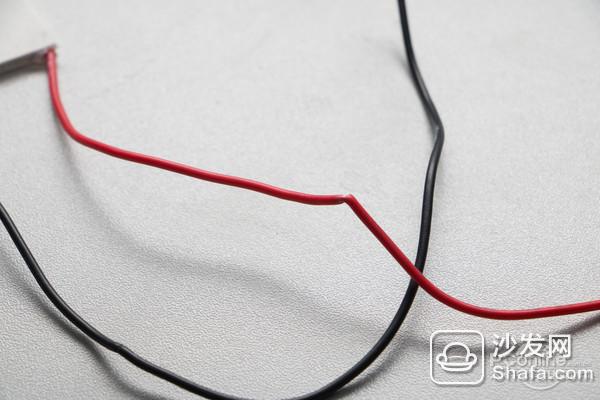
Before assembling, we first connected the circuit. In fact, it is a very simple bidirectional DC circuit. Three red lines are connected and three black lines are connected. Then they are soldered with soldering iron and solder. Because the refrigerated conductor wire just bought back is a bit long, we have to cut it off, and about 8CM is enough.
Xiaobian welders dregs, the specific welding skills will not be mentioned, but after all, is not a precision circuit, so as long as the circuit can be smooth, there is no problem.
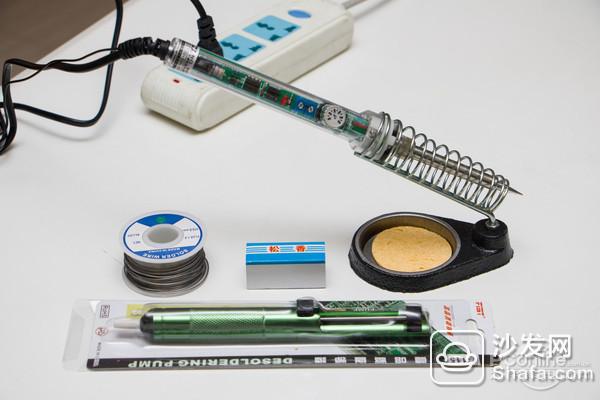
The tools needed are these.
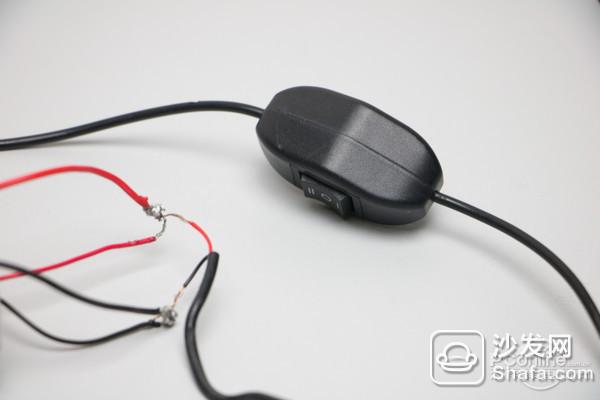
It should be noted here that because of the limited space in the refrigerator, the friction and contact between the wires must not be avoided. Therefore, we must use adhesive tape to stick the two solder joints well and make good insulation to avoid short circuits.

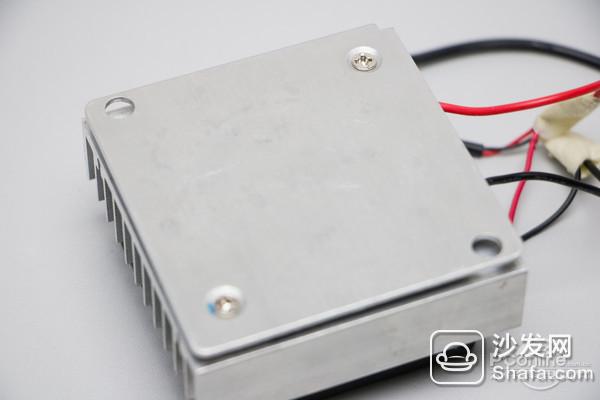
Below we assemble the core components.
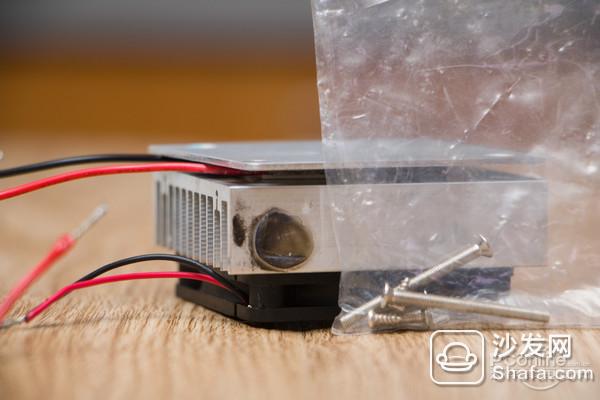
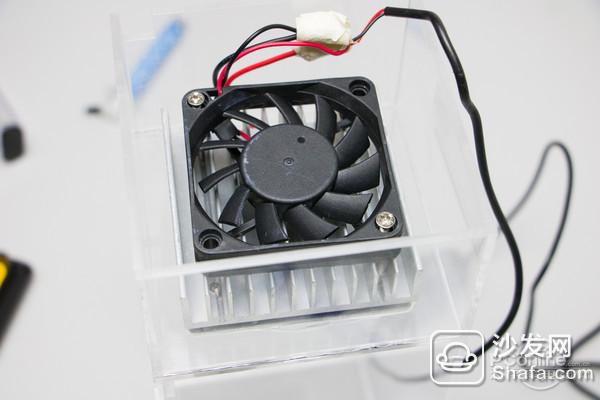
First use the ancestors of Beastmaster's ancestors to paint the entire cooling plate. The coating method is similar to that of the CPU. Hey, don't you know that CPU is coated with grease? Ask Beastmaster next door!
The difference is that we have to apply double-sided silicone grease on one side and the other on the other side to connect a relatively thin cooling plate.
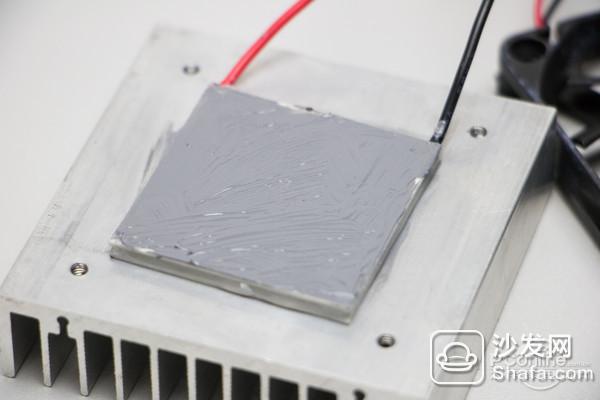
Then tighten the screws to fix. The two screws on the front side fix the cooling plate; the two screws on the back fix the fan. Since the length was wrong at the time, the screws could not be screwed to the head. However, the problem is not so big, as long as the fan and the heat sink can ensure air circulation. .
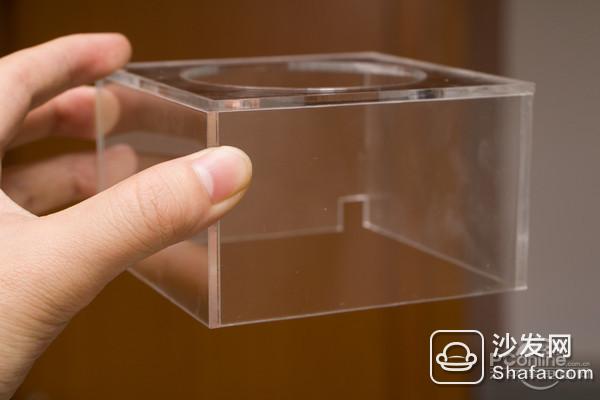
Get the core parts and get the shell. Of course, the first choice for the outer shell material is transparent acrylic, which is both beautiful and easy to make. In a certain treasure, there are many businesses that can be customized in any size. First of all, you need to measure the size, because it is necessary to put your hand into the drink, so it is best to leave 1-2 cm of space between the front and back. The height of the lower part refers to the height of the previously assembled core components, remember to leave room for air circulation; the upper part of the height is more flexible, if you want to put a 600ml can inside the refrigerator, it is higher, if only put Small cans can be lower. Directly on the design.
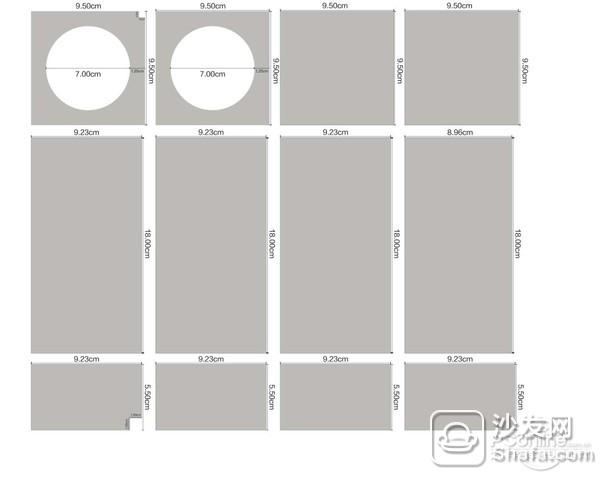
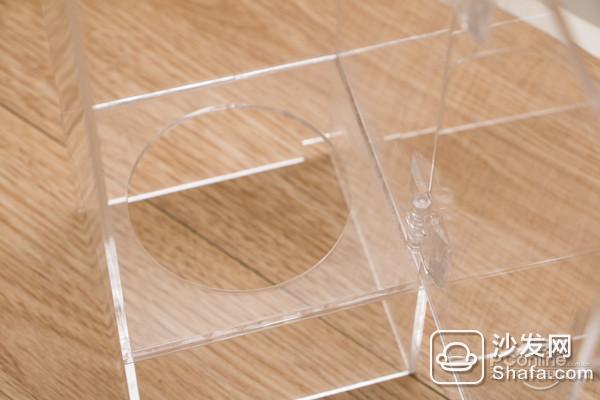
The middle of the two empty, one is used as the bottom of the first half, the other used to do the bottom of the entire refrigerator. The former is hollowed out so that the bottom of the can can be in contact with the cooling plate to facilitate the cooling of the beverage; the latter is for the air circulation in the heat dissipation part.
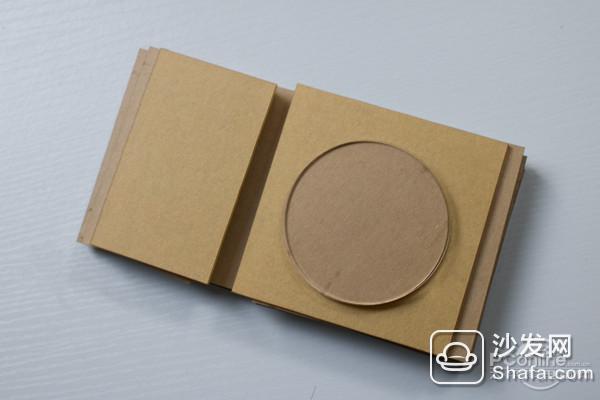
Because there is a wire to pass through, there is a gap of about 1cm*1cm left on one of the bottoms.
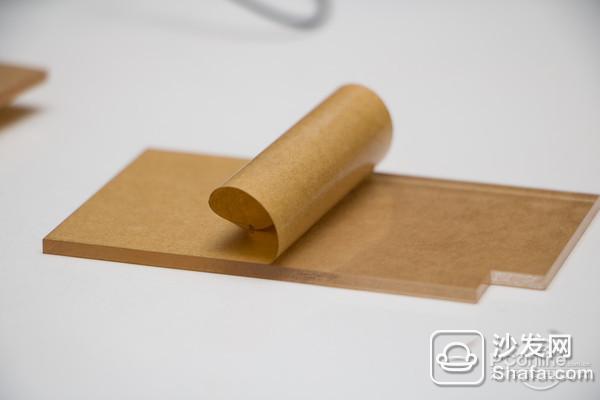
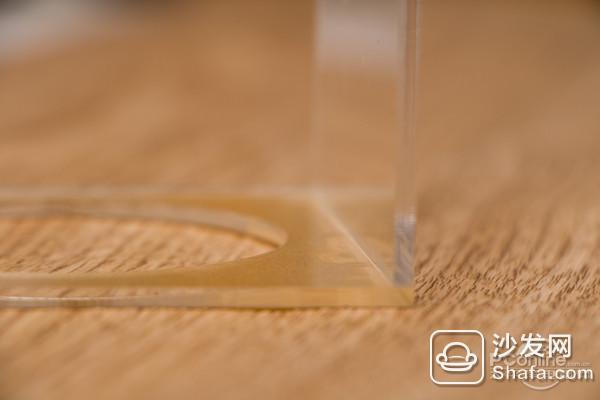
Remove the protective film and start pasting. It is recommended to use plexiglass special glue, which is very sticky and does not leave any traces.

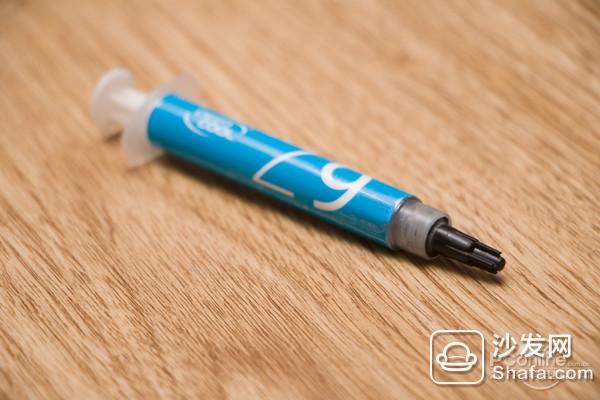
When using it, take it to the syringe first.

Hold down the part that needs to be connected, and then slowly inject the glue to the edge with injections. This overflow is not afraid because there will be no traces.
Under normal circumstances, the glue will automatically penetrate into the gap due to the tension.
Remember that the order of our pasting should be from bottom to top, from part to whole, so that the whole process of merging will be more smoothly.

Stick the base first.
Reattach the top.

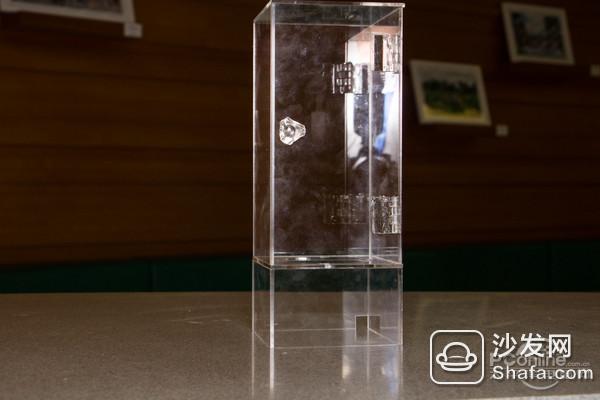
Finally spliced.
The more difficult part is the hinge part. Because the size of the hinge that Xiaobian bought is too large, even if the position of the door axis is reserved in advance, it is very difficult to grasp the paste position. Therefore, it is recommended that everyone use double-sided tape in this step. Determine the location and fix it with acrylic glue.

Finally, stick the door handle to the shell!

Look, it will shine under the light.
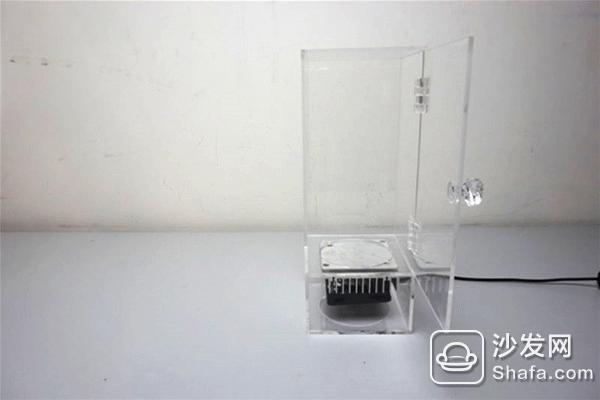
Put the core part into the shell, like this ~ then apply the glue according to the familiar method, press for a few minutes, perfect!
In order to prevent the wire from being pulled out, you need to tie a knot in the gap. Of course, you can fix it by other methods.

Last back cover! Put drink test~complete!

Postscript: Although there is sufficient preparation, this refrigerator is not far from perfect. When it comes to actual operation, you will always encounter some situations that you never thought of before. Here we talk about it and give it to you. The small partner to do is a reference.
1, the reserved shaft space is not enough, the beginning of the design only considered to leave a gap switch, but did not consider the switch angle, leading to this refrigerator door opening angle is only 90 degrees, very inconvenient;
2. The connection between the core part and the shell is not stable enough. The careful friend definitely found out that I used Acrylic glue to connect the cooling sheet and the shell, but the acrylic glue is not very good for the metal paste effect, and this part needs to bear a bottle of drink The pressure, so the strength of this structure is certainly not enough, it is recommended to add a bracket below, or use screws to fix;
3, the air around the fan does not circulate, even if the bottom hole, the air circulation effect is also very poor, if you want to improve, you can install 4 feet in the bottom, let the refrigerator vacant.
Did you ask me about the cooling effect of this refrigerator? In fact, the cooling power is not high, assuming the connection of 5V 2A USB power supply, the theoretical total power of 10W, divided by the fan 1.5W, coupled with the loss of the circuit, and then count the conversion rate of the cooling sheet, the theoretical cooling The power may be only about 5W, but it is still enough to keep cold or hot drinks warm. (127010 maximum power is 89W, unfortunately our power supply does not reach this output level) Let's play with DIY, play is a happy and sense of accomplishment ~
Say hello to a circle of friends on the title. Actually because I sent such a small video.
They thought I made a transmitter...
I am the sea, we see you next time~
Focusing on the development and production of Wireless Charging products that make life easier.
Supply various wireless charger including multifunctional Wireless Charger, Car Wireless Charger, Magnetic Wireless Chargin, Wireless Charging Mouse Pad, etc.
We help 200+ customers create custom wireless charging products design for various industries.
Manufacturing high quality products for customers according to international standards, such as CE ROHS FCC REACH UL SGS BQB etc.
Wireless Charging Pad,Wireless Phone Charger,Wireless Car Charger,Bluetooth Charger
TOPNOTCH INTERNATIONAL GROUP LIMITED , https://www.mic11.com